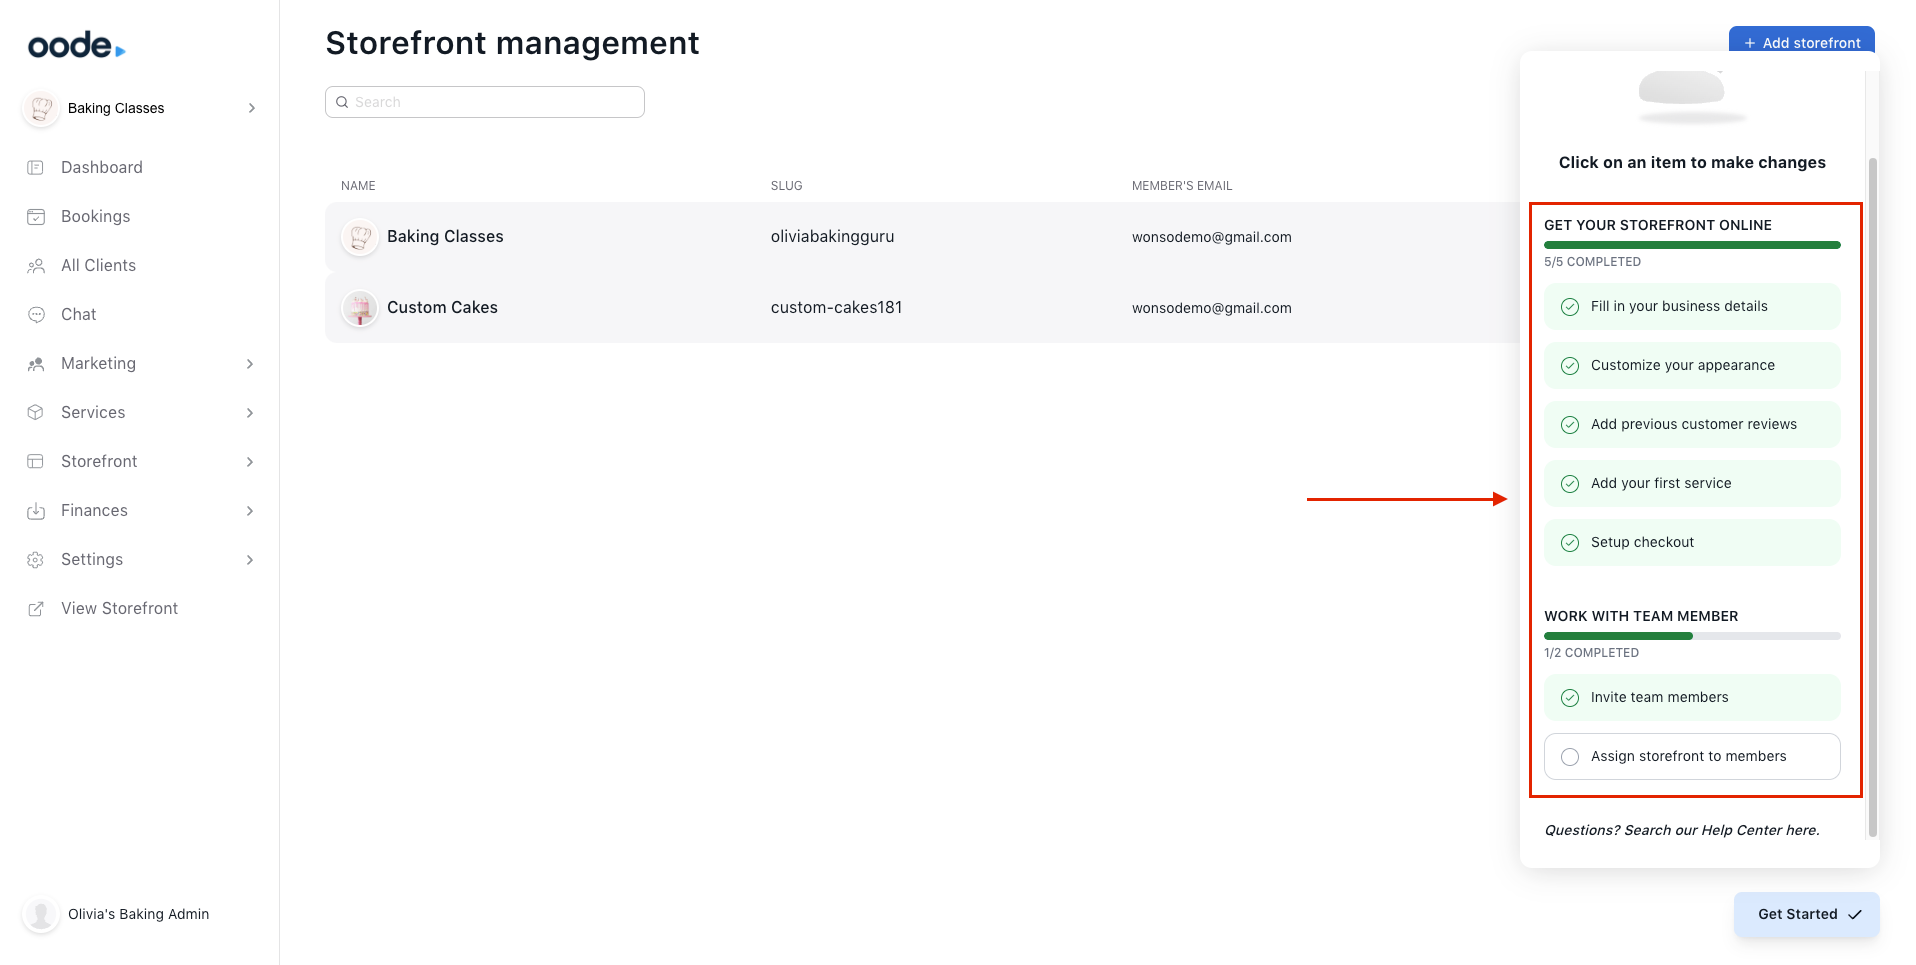
Your onboarding checklist
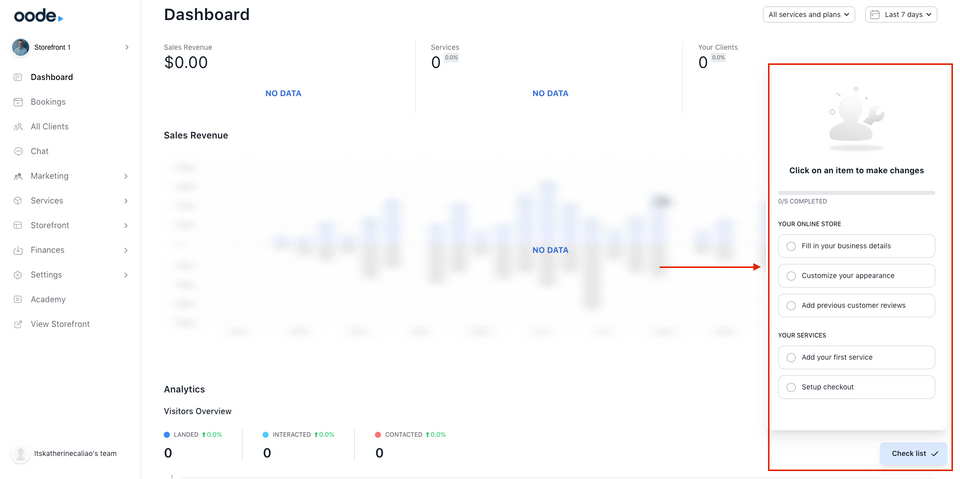
Oode adds an onboarding checklist to make the entire process of building and setting up your own digital storefront more convenient.
Instead of navigating the entire platform manually to edit each storefront detail, you can now just refer to the checklist and select an item for faster redirection.
Upon signing up, you will see a small checklist card at the bottom of your screen.

Click on the card and it will give you a full view of the items you need to do to create a complete storefront.
This checklist makes it easier to navigate the platform because each item you click leads you directly to the page you need to be on.

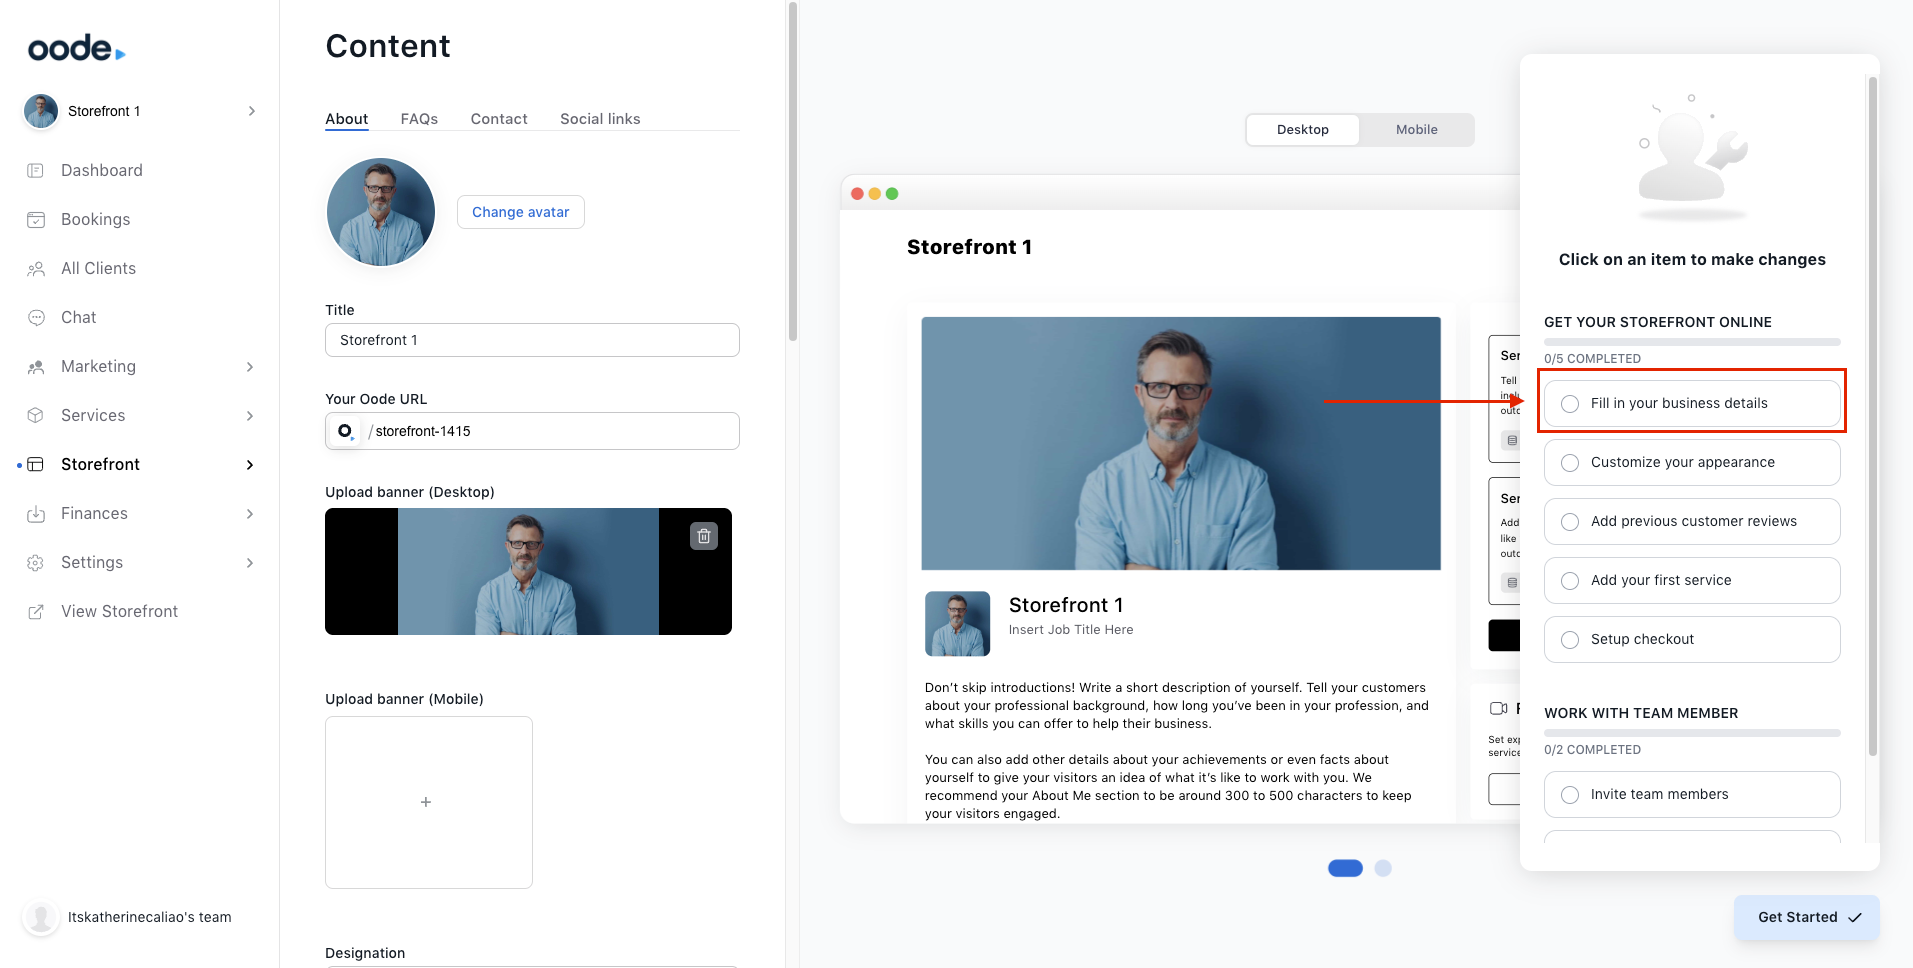
Fill in your business details
The checklist first asks you to fill in your business details. As soon as you select this item on the checklist, you will be directed to the Storefront Content page where you can edit basic information about your storefront such as your avatar, storefront name, URL, banner, description, opening hours, and so much more.
We made a detailed guide on editing your storefront content here.
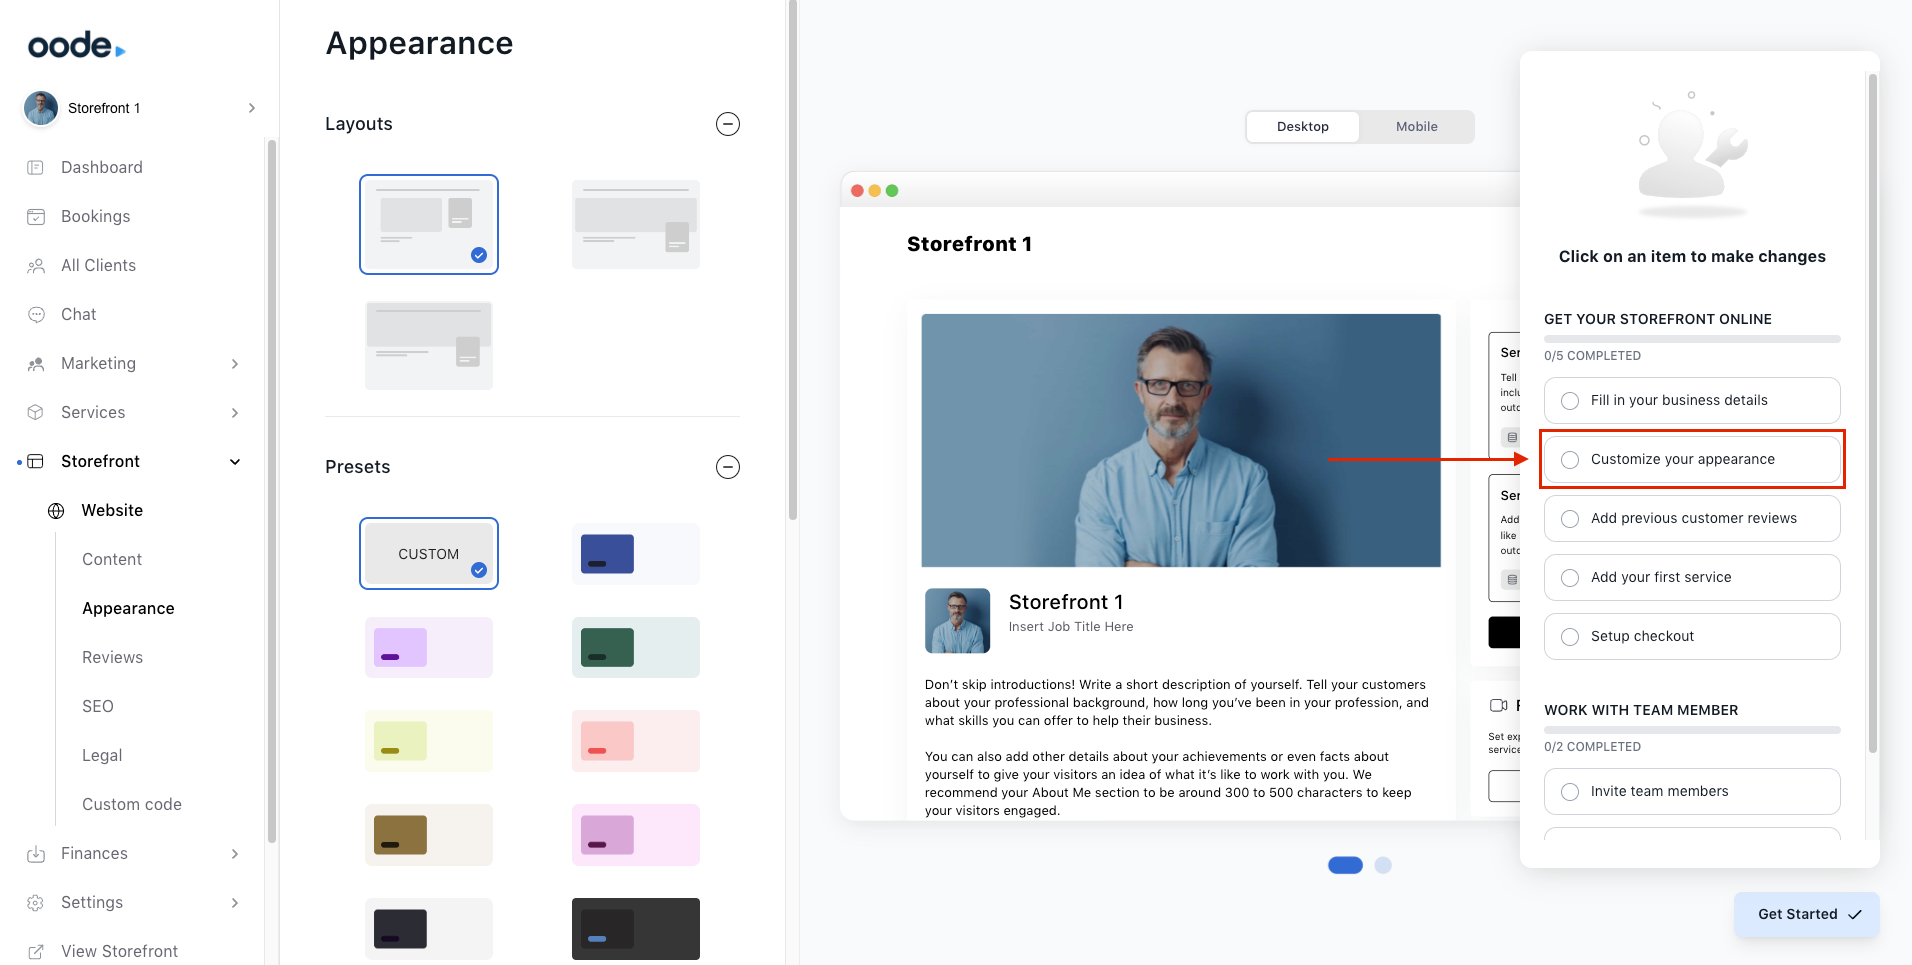
Customize your appearance
The second item on your checklist is customizing your digital storefront’s appearance. Once you click on the item, you will be directed to the Appearance page where you can experiment and have fun with how you want your storefront to look.
We made a detailed guide on customizing your storefront appearance here.
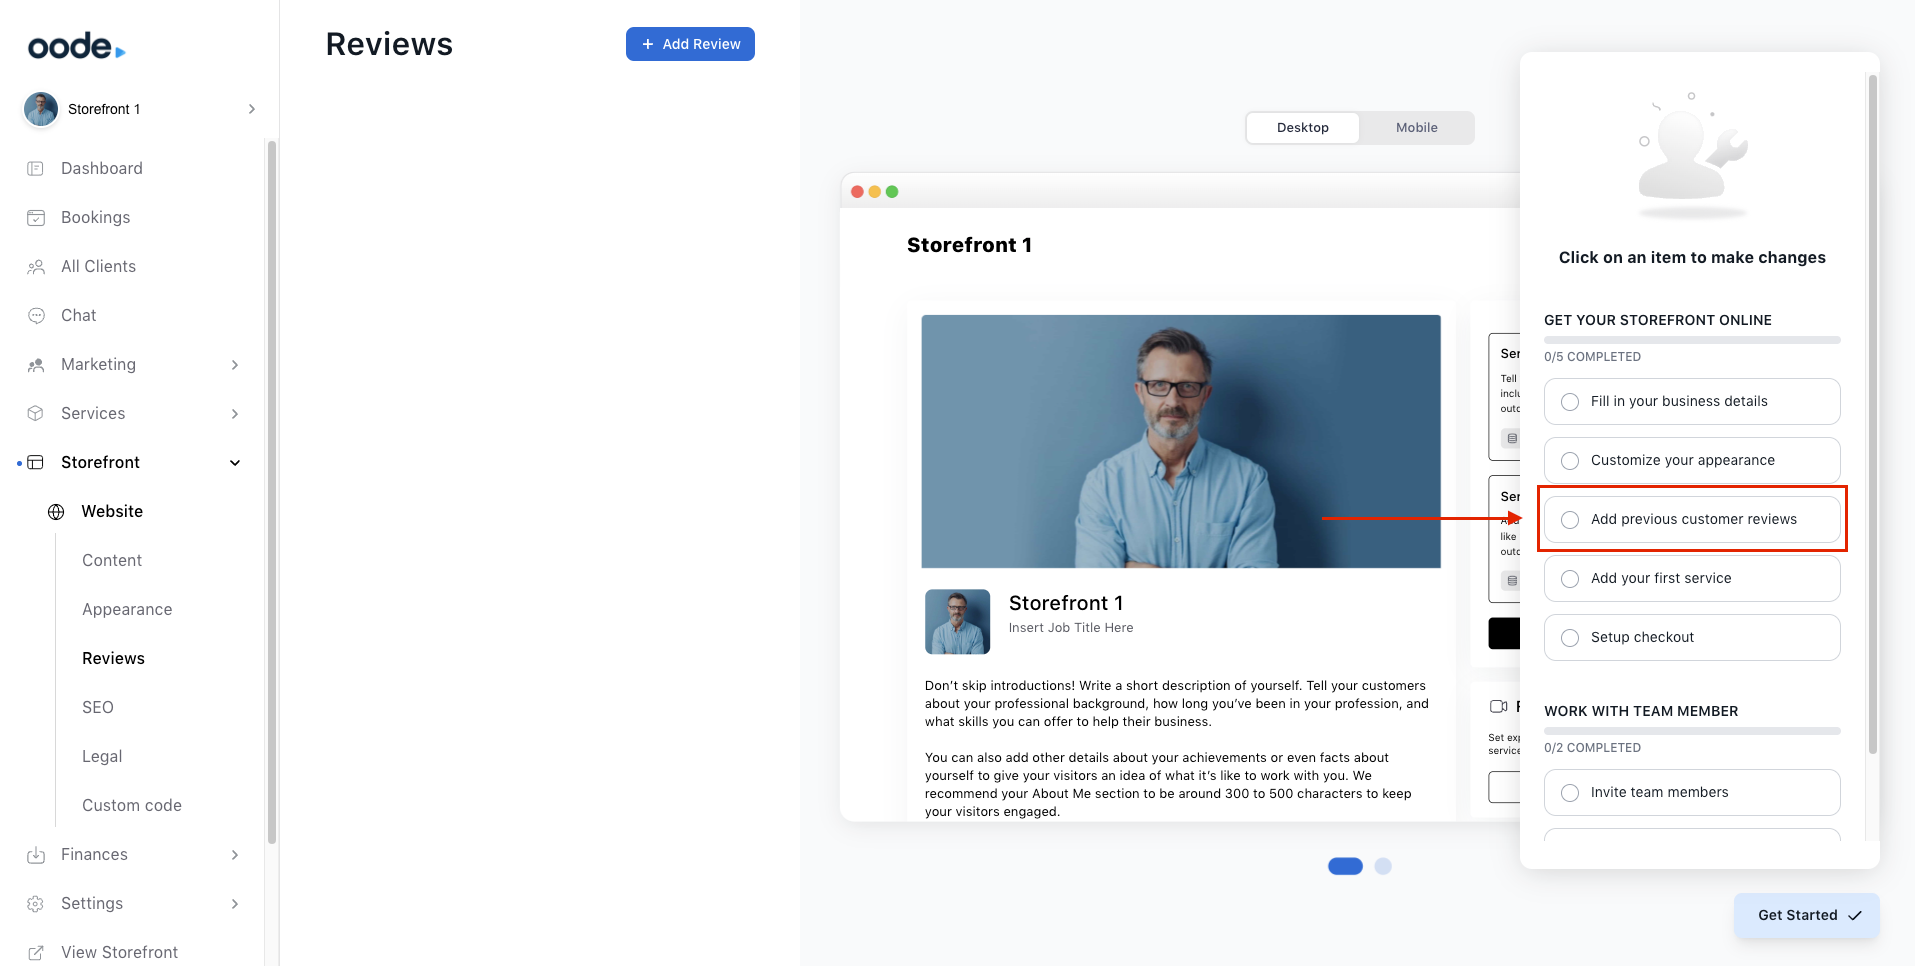
Add previous customer reviews
The third item on the checklist is to add reviews by previous customers.
If this is your first time selling your services and subscriptions, you can skip this step. However, if you have testimonials from previous works, add what other people have to say about your business through the Reviews section.
Click on the item and you will be directed to the Reviews page where you can add as many reviews as you want.
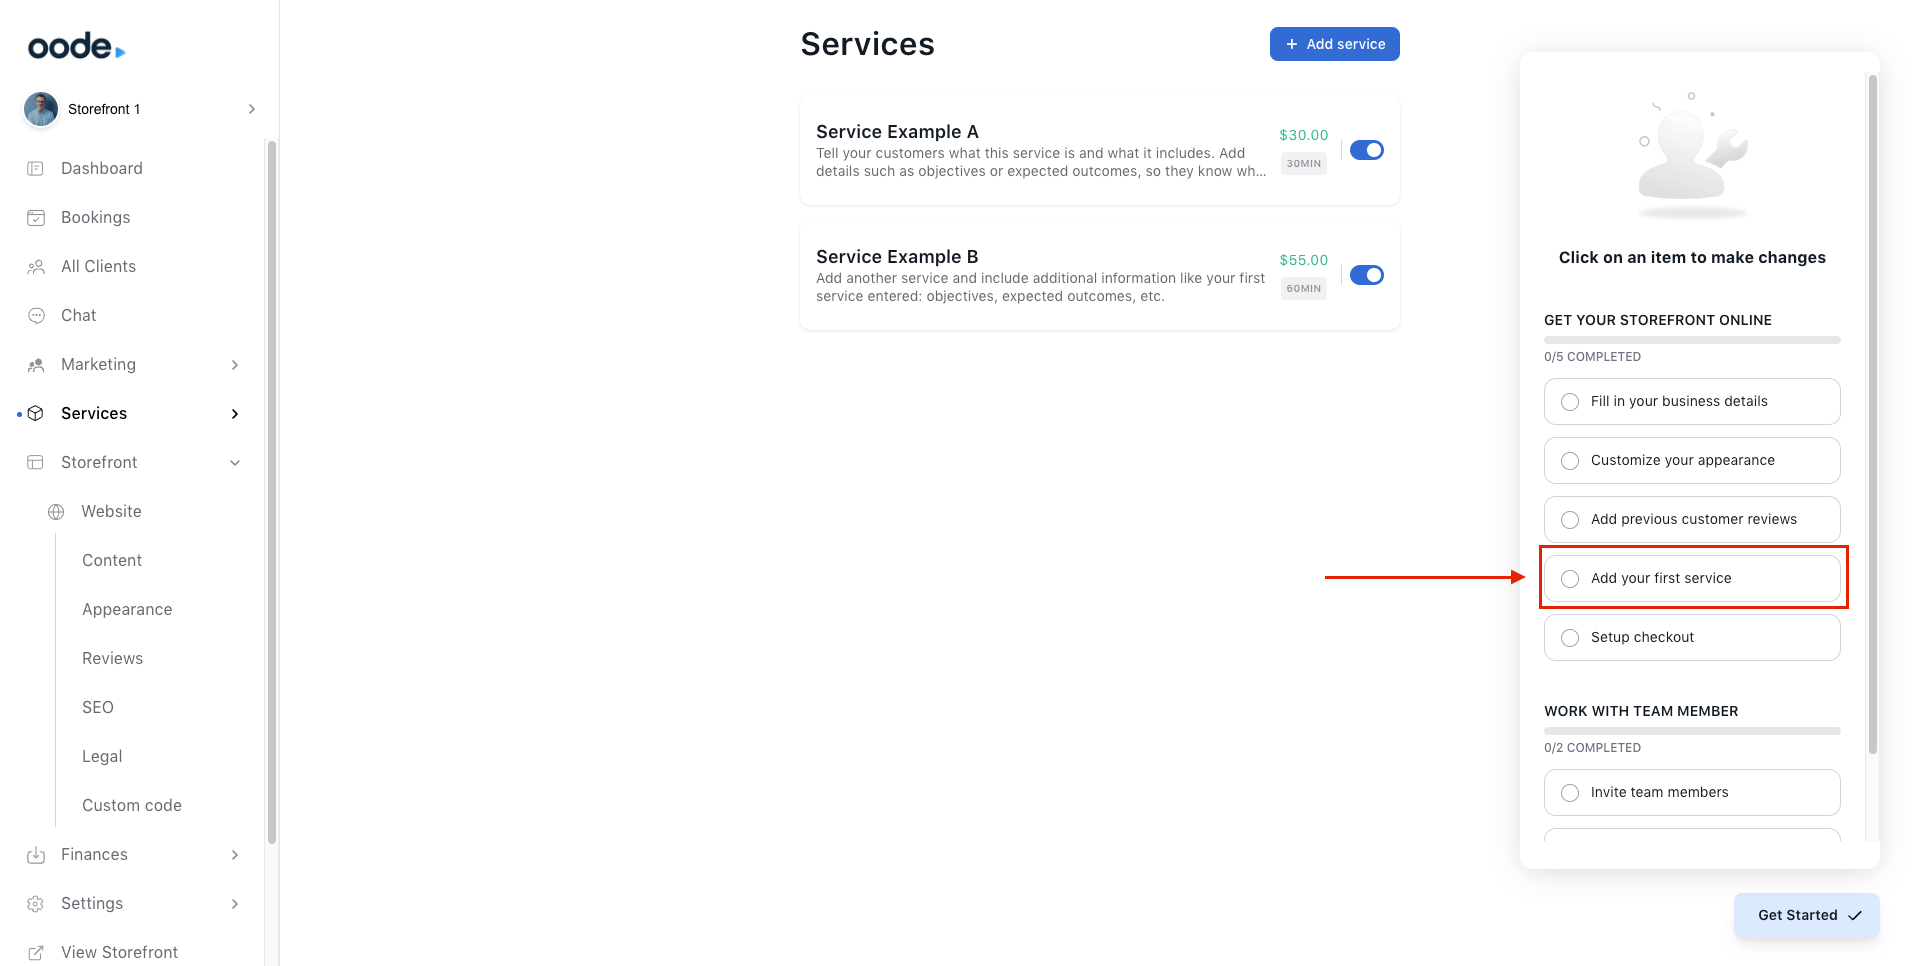
Add your first service
The next item on your checklist is to Add your first service.
Once clicked, you will be directed to the Services page where you can also add as many services as you want.
We created a more detailed guide on how to edit and manage your services here.
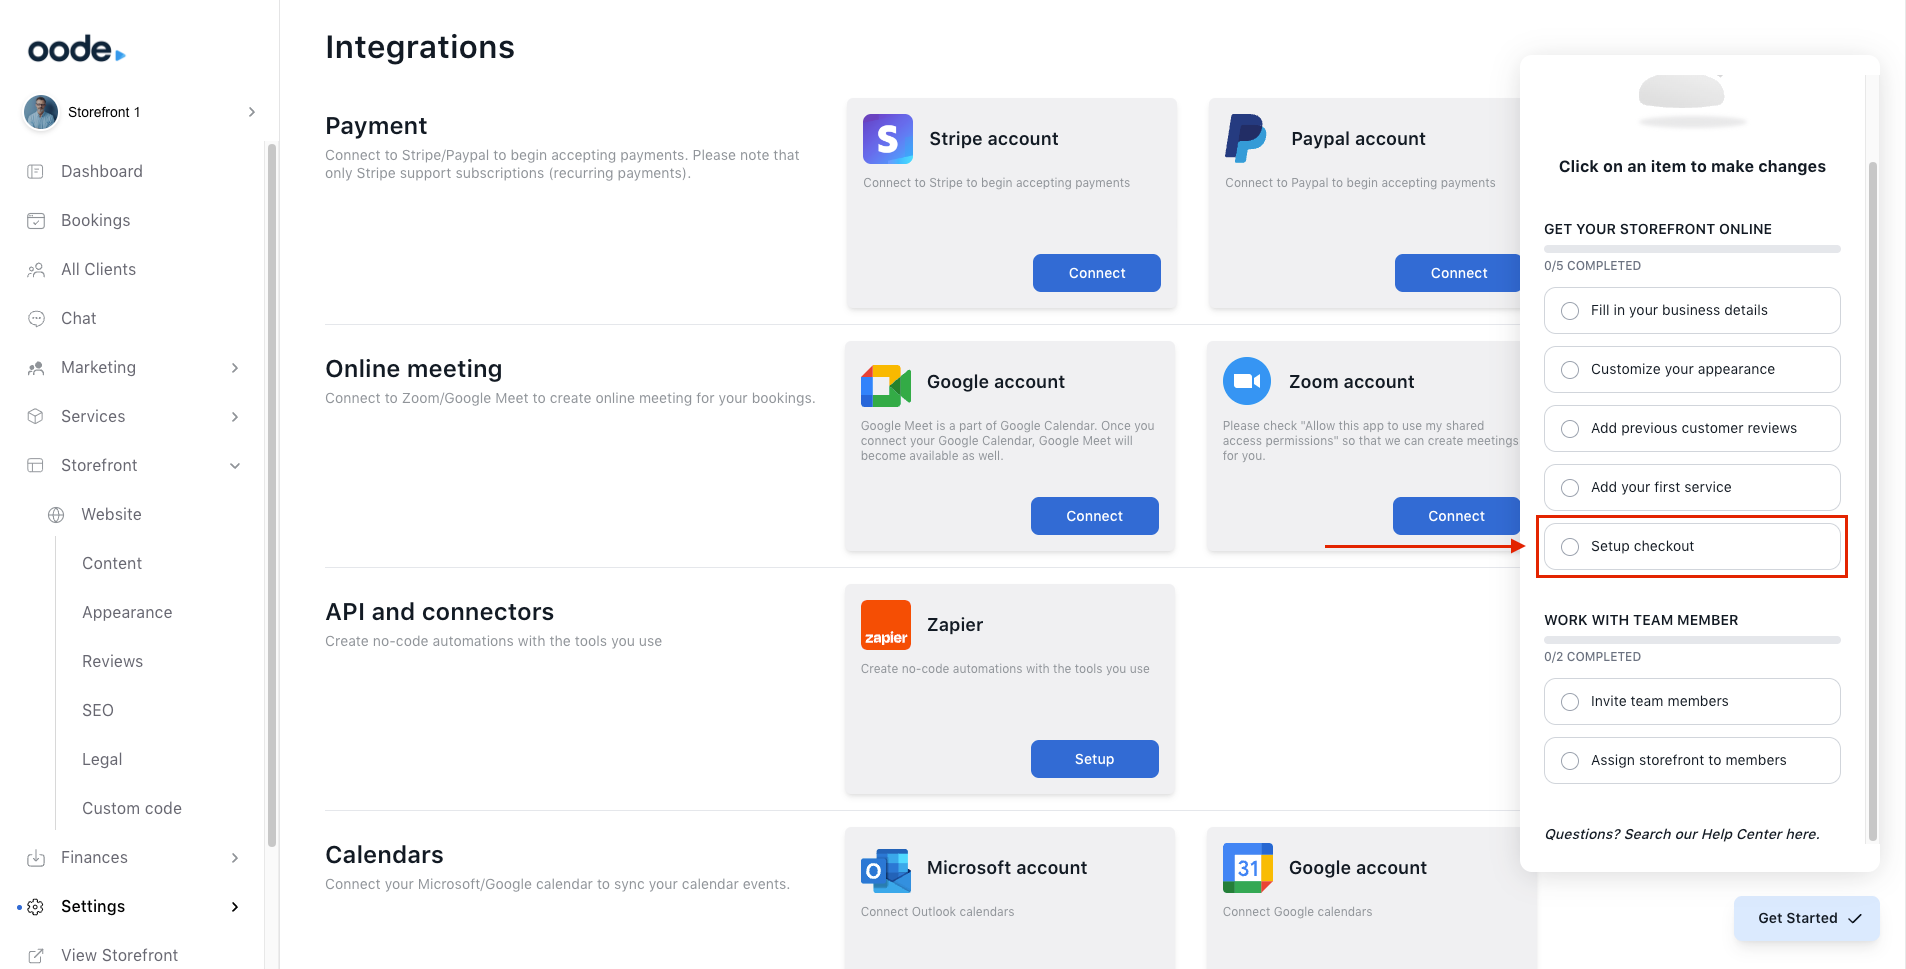
Set up checkout
To completely launch your digital storefront and accept bookings and payments, you need to complete the last item on your checklist which is to set up checkout.
Click on the item and you will be directed to the Integrations page where you can connect your Stripe, Paypal, Google, Zoom, Zapier, and calendar accounts so you can finally run and manage your business seamlessly.
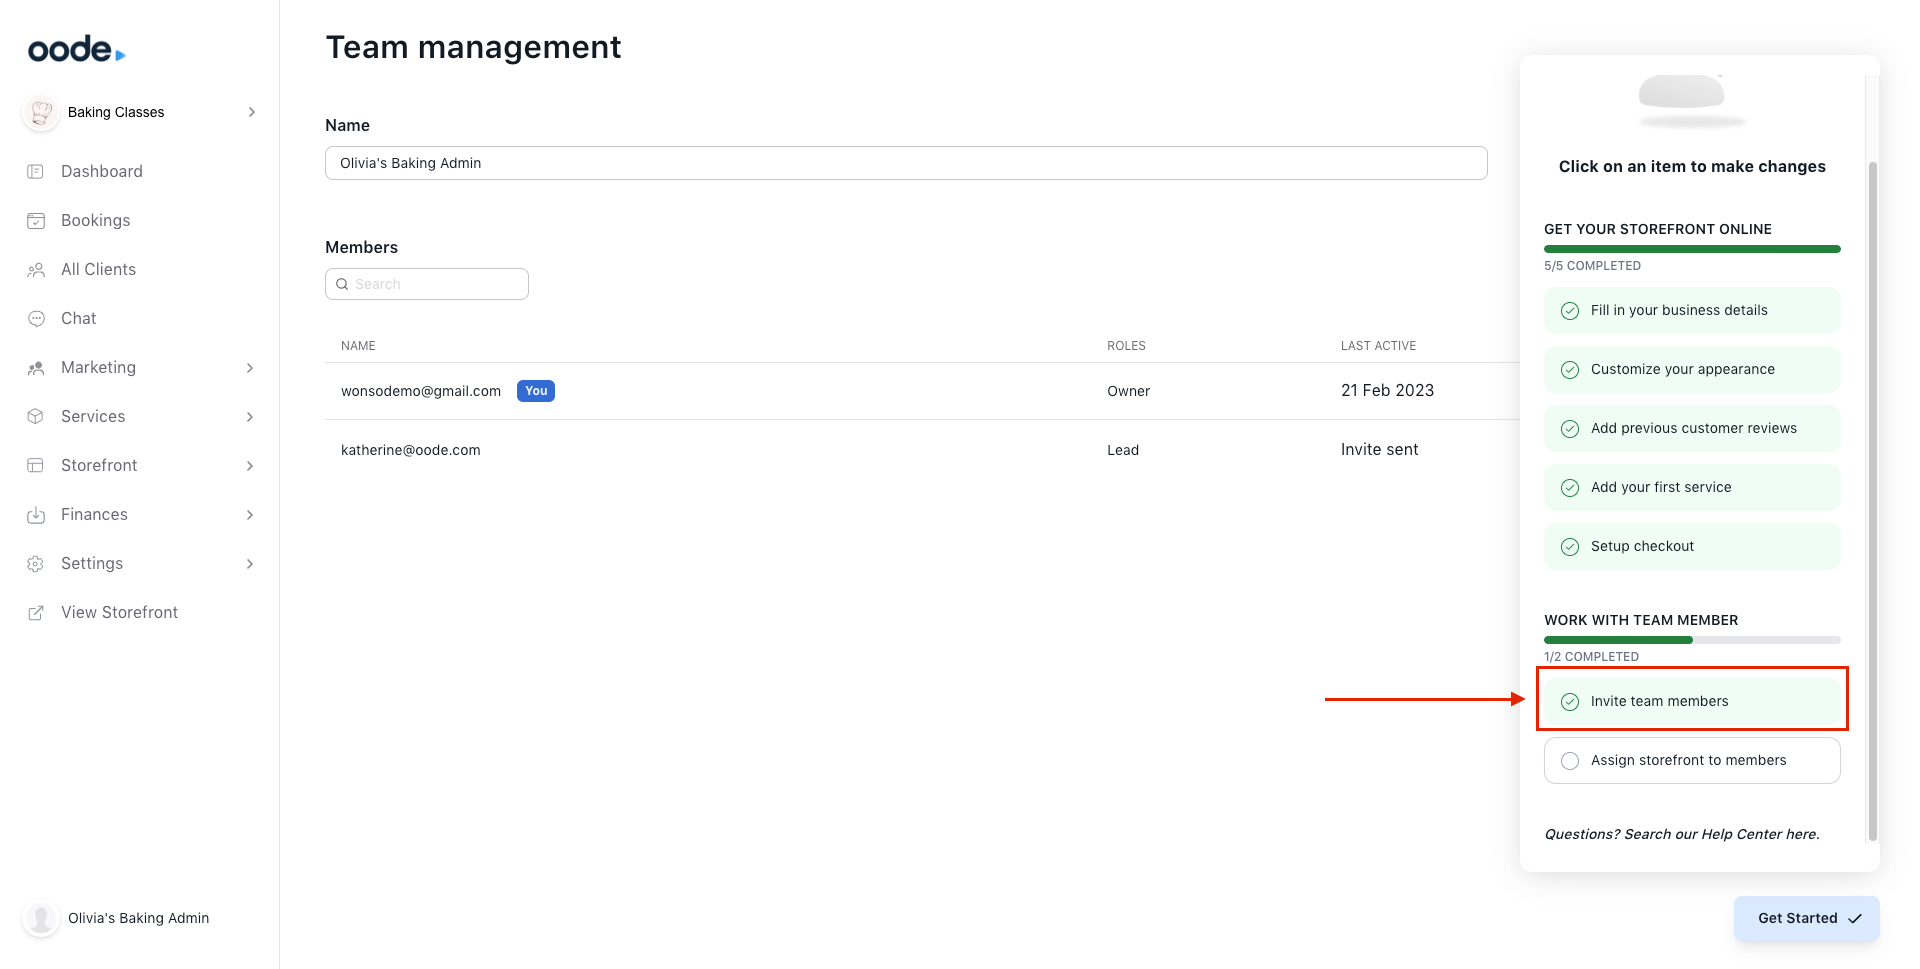
Work with team member
Make business management a lot easier when you invite others to help you out. Oode allows more than one user to manage your online store. All you have to do is invite a user to join the team from your Oode dashboard.
Click on Invite Team members on the checklist and you will be directed to the Team management page where you can add users through their emails.
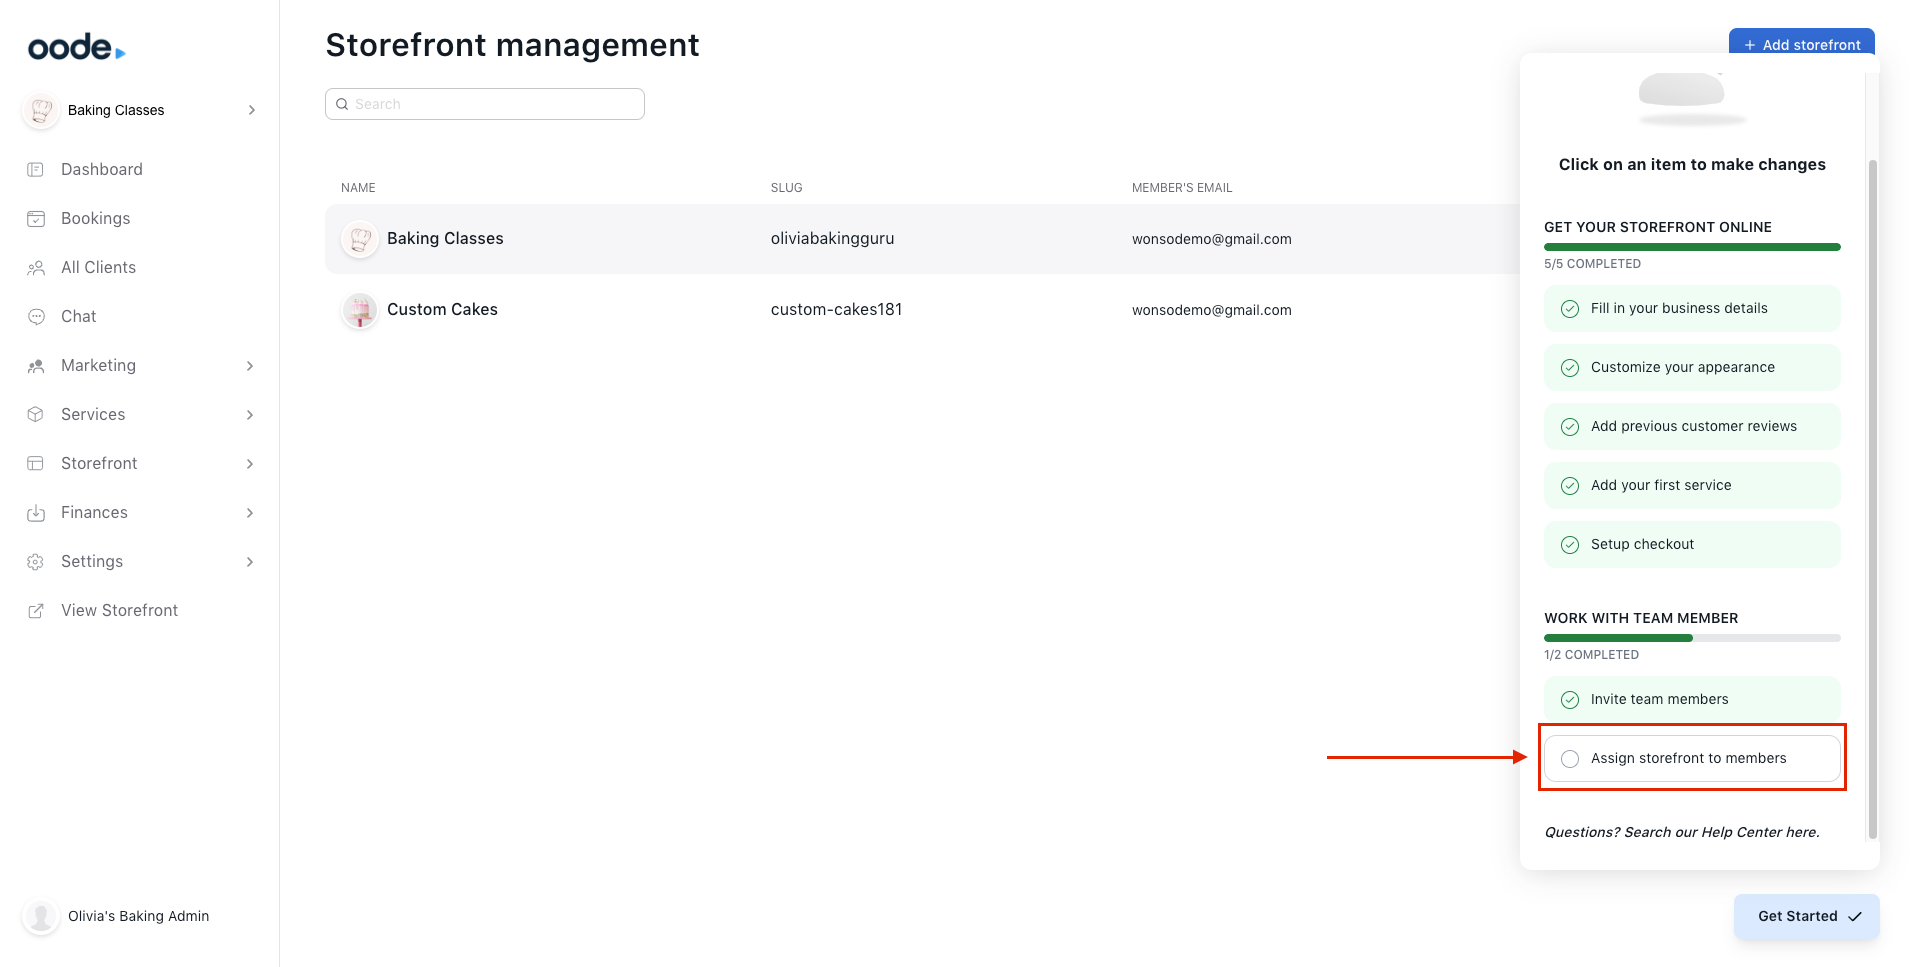
Choose which storefront you want to assign your team members. Simply click on the last item on the checklist and you will be directed to the Storefront management page where you can edit each storefront's details including their members.
We created a more detailed guides on how to add and manage multiple storefronts here.
Completing the checklist
Track your setup progress by referring to your checklist.
Every time you complete a step, you will see the item turn green and checked-off the list.
Continue the process until every item is checked off and the checklist card disappears.